Wednesday, December 8, 2010

Chili Rellenos

Sooo tonight was the night to try Chili Rellenos.  I honestly have been putting it off.  As much as I wanted to try making these, I was a little wary of the directions.  It seemed like a lot of work and I wasn't even sure if they would taste good, but they turned out good.  I got the recipe Here.  Everything turned out fine up until dipping them in the batter.  I followed the instructions but the batter didn't "stick" to the chilie so when I put them on the baking tray to put in the oven the batter just dripped to the bottom.  I'm not really sure what I did wrong or even how to fix this from happening.  Any tips?


On a side note do you see my cute little winter owl salt and pepper shakers!!  Early xmas gift from my madre.  


Nonetheless they tasted good even without the batter.  I used Daiya cheddar cheese instead of "follow your heart" and black beans for the filling.  They must have been good Husband and I cleaned our plates.  =)

 
I think I'll try and make these again but do some research on ways to fix my batter problem.  Up next, Chili!!! I was going to make it tonight but realized the largest pot I have wasn't big enough so I'm borrowing one from my co-worker, in return I'll feed them (if it turns out good that is!).  Till next time! 

Laissez Les Bon Temps Rouler!

Tuesday, December 7, 2010

Creamy Chickpea and Tahini Casserole

This is my second time making this and won't be the last.  This was the recipe that got me started with the whole cooking schenanegans.  It's super easy and quick and soooo delicious.  It's a true comfort food.  I'm busy prepping to make my chili that we'll have on Thursday so I wanted something yummy but easy so I'm not prepping two meals.  The only time consuming part is waiting for the rice to cook, and the casserole to bake.  I found the recipe Here.  I did make a few adjustments.  I doubled all of the spices and doubled the tahini and added a little bit of red pepper flakes.  There are a ton of ways to make this one your own so have fun with it!


These photos are from the first time I made it.  Mine is still in the oven cooking.  Doesn't it look good!!!

Laissez Les Bon Temps Rouler!

Monday, December 6, 2010

Pineapple Rice

Since I'm on a roll I figured I'd post about tonights dinner.  I ♥ pineapples so this recipe sounded delicious.  Plus Husband isn't a fan like I am and had already eaten.  I got the recipe Here.  I'm not sure exactly what I did wrong.  I followed the instructions (except left out the arugula because I didn't have any on hand, and I figured the rice would be enough).  The shallots were WAAYY too strong for my taste, I guess the rice wasn't enough?  I probably wouldn't make it again, but if I did I would cut back on the shallots for sure.  The picture looks nice though!  ***UPDATE*** I ate the leftovers for lunch today (I hate wasting food) and it wasn't bad.  I actually liked it a lot better today.  I ate it cold instead of hot and the shallots weren't as strong (not sure if time or them being cold helped with that).  I still picked through the shallots but with a little modification I think this recipe would be nice.  =)  I thought it was worth sharing. 


I did like the dressing though, I saved that and might use for a salad or dipping?  Plus I got a glass of pineapple juice that I stuck in the freezer for a nice treat out of it, so it wasn't a total waste. 

Winter Is in the Air

Well I haven't done much blog worthy cooking the past few days but I did get my christmas tree up and the house decorated!!! Its funny how excited a simple tree and lights can make me!!  I was like a little kid waking up at 5am to open their presents on christmas day!!  This year was extra special because the first few years Husband and I were together we didn't get a tree because of circumstances so this was our first tree as a couple (enter AWWW here)!  Plus it's even more sentimental because my mom let us go through her old christmas boxes that were full of all the old ornaments we use to use as a kid (Old ornaments are way better than new ornaments!).  So the perfect hodge podge tree was born! 


Well I did cook one good meal, and when I say good I mean GOOOOODDDD!!!  Before bearing the ugly weather to pick up a tree, I cooked the most delicious breakfast I've had in years!!! FRENCH TOAST!!  I would even go as far as saying it was this meal that gave Husband and I the energy to drive to 4 (yes 4!) stores within 20 miles of my house to find a christmas tree stand in the pouring rain.  The lovely Bailey directed me HERE for the recipe.  I didn't have chickpea flour on hand so I just used regular unbleached flour and it turned out fine.  It was soo good..literally it tasted JUST like the "real' thing.  Husband devoured it!  I've made the executive decision to make it on Christmas morning for the family too!!  This recipe will definitely see many a days in my kitchen! 


On a side note, I've been makin' groceries and finally have a fully stocked kitchen for the next week of meals


On the menu for this week, Potato and corn chowder, Chili Rellenos (A little nervous about this one!) with a side of spanish rice, Italian Cassoulet (which I'll need mouths to feed since it makes a gallon and I'm too afraid to cut the recipe on the first try, so please volunteer yourself to come over and try it out!) with cornbread, pineapple rice, and twice baked fingerling potatos by the chef Tal Ronnen.   Excited for all the new adventures in the kitchen.  Wish me luck.  I'll be sure to keep you posted on my success (or lack there of).  Till next time...

Laissez Les Bon Temps Rouler!!


Thursday, December 2, 2010

Giving Thanks 2010 Part 2

It's cold and raining outside, so normally I'm cuddled at home in my bazillion blankets, fluffy socks and Bella!!  I'm not a winter girl, I prefer the heat any day, but I have to say the colors of the trees, hot soup, the holidays, and of course cuddling definitely make it bearable!  Now to finish up on Thanksgiving feast! 


Fresh green beans with leek and dill

I got this recipe online at http://www.101cookbooks.com/vegan_recipes/.  This recipe is meant to keep the green beans fairly "raw".  I tried it the way the receipe states but found I don't have a taste for them.  After following the recipe as stated below (with the health of my sister) added a little bit of left over veggie broth (just to cover the bottom of the pan) covered and cooked for a few more minutes, came out great! 

Ingredients:
4 leeks, well washed, root end and tops trimmed, sliced lengthwise into quarters and then chopped into 1/2-inch segments (see photo in main post)
1/3 cup fresh dill, well chopped
3/4 pound green beans, tops and tails trimmed and cut into 1-inch segments
extra-virgin olive oil
fine-grain sea salt

Directions:
In a large thick-bottomed skillet of medium-high heat add a generous splash of olive oil, a generous pinch of salt and the leeks. Stir until the leeks are coated and glossy. Cook, stirring regularly until a lot of the leeks are golden and crispy. I stir every minute or two in the beginning, and more often as they brown using a metal spatula. All in all it takes me roughly 7 - 10 minutes to brown the leeks. At this point stir in the dill, and then stir in the green beans. Cook for a couple more minutes - just until the beans brighten up and lose that raw bite. Turn out into a bowl or onto a platter and serve immediately. This recipe makes the most beautiful green color!


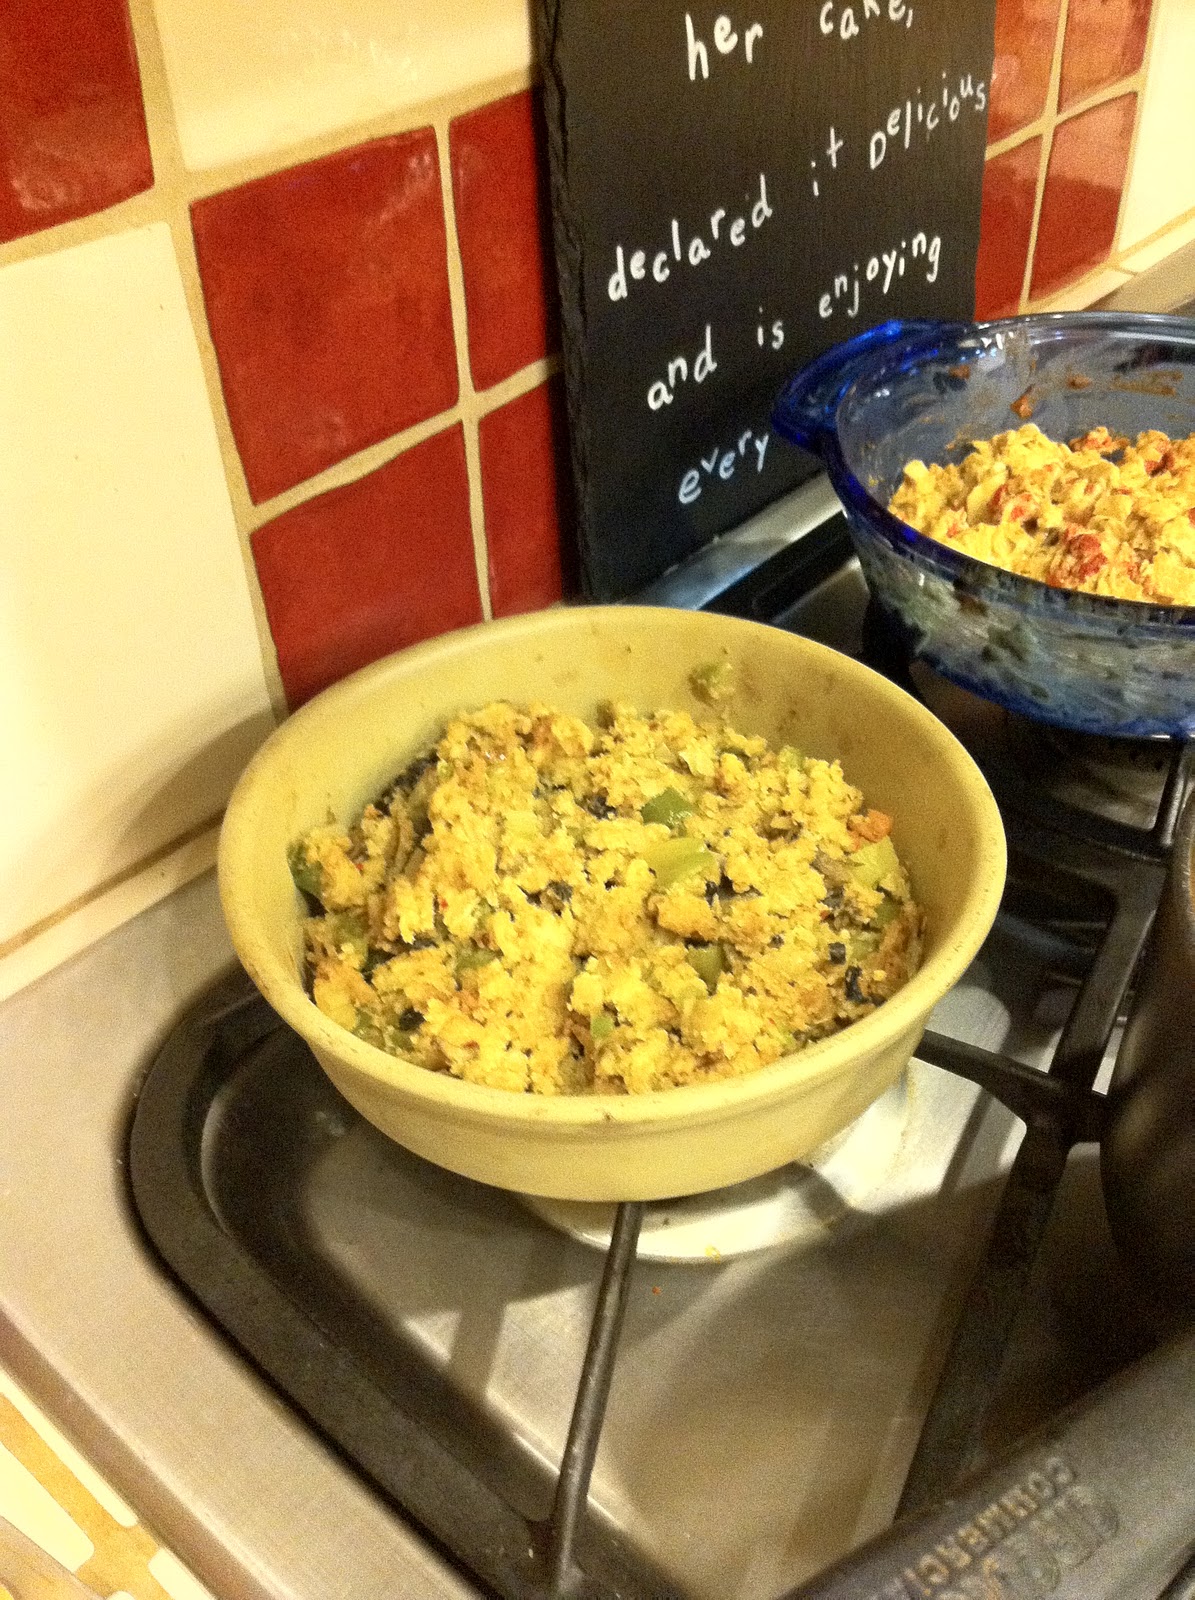
Spicy Cajun Cornbread Dressing

Ingredients:
3 tbsp vegan margarine
1 cup red or yellow bell pepper, diced
1 medium onion, diced
1 cup celery, diced
1 cup sliced mushrooms
4 cloves garlic, minced
1 tsp thyme
1 tsp sage
1/3 tsp cayenne pepper
5 cups cornbread, sliced into cubes
salt and pepper, to taste
2 cups vegetable broth
 
Directions:
 
1. Preheat the oven to 350 degrees and lightly grease a large 13x9 inch baking pan. 2. In a large pot, melt the vegan margarine, and add bell peppers, onions, celery, mushrooms, garlic, thyme, sage and cayenne pepper. Heat, stirring frequently, until veggies are soft, about ten minutes.
3. Remove from heat and add cornbread, seasoning generously with salt and pepper. Add vegetable broth, gently tossing to coat well, making sure mixture is well moistened.
4. Bake in pre-heated oven for 45 minutes. Remove foil and bake an additional 10-15 minutes, until done.


The potatos are just mashed with a little bit of salt and pepper, nothing fancy, but sometimes simplicity is key!  The whole meal was delicious.  I can't wait to start planning Christmas Dinner!! =)  Happy late Thanksgiving everyone...till next year!

Laissez Les Bon Temps Rouler


Wednesday, December 1, 2010

Giving Thanks 2010 Part 1

As stated in my last post our fridge is low on food and shopping isn't until Friday so the masterpieces will have to wait until then.  Although I did make some "BOMB" (yes! I just said bomb) nachos yesterday for dinner (Chips + Daiya "cheese"** + sliced jalapenos + refried beans**), and tonight the go to spaghetti from the jar (doctored with onions, garlic, red pepper flakes and italian seasoning).   Since none of that is very interesting I'll take this time to catch everyone up on the meals I made prior to blogging, which the biggest of them all being Thanksgiving!!!  This was very exciting to me since I have never been the one in the kitchen at Thanksgiving, and this year I had a ton of great recipes I wanted to try, many becoming staples in my cookbook and for the holidays! I figured to do the whole Thanksgiving would be one long post (it's already long as is) so I'll split it up, first up appetizer, then bread!

Roasted Red Pepper and Artichoke Dip:
This dip I discovered last year on the web at Food.com, FKA recipezaar.com (I really like this website because you can search and find an array of recipes from all over).  I was hooked after the first try and have made it multiple times since.  It was first on my list for this year!  This isn't the best picture but trust me it's yummy!


Ingredients:
1 Tablespoon of Olive Oil
1/2 cup onions finely chopped
3/4 cup roasted red peppers, diced (I get mine from the jar but you can definitely make them yourself)
2 Garlic Cloves, minced
1 (14 1/2 ounce) can artichokes, drained and chopped (I buy the HUGE jar from Sam's Club so I just measure mine out)
1/2 cup raw cashews (this is what makes it creamy!! YUM)
1/2 cup hot water
2 Tablespoons lemon juice
1 Teaspoon braggs liquid aminos (if you don't have this on hand you can substitute soy sauce)
1 Tablespoon nutritional yeast flakes (I get mine out of the bulk section of the grocery store, they are little yellow flakes)
1 Teaspoon dried italian seasoning
1 Teaspoon salt (to taste)
black pepper, to taste

Directions:
1. On medium high heat, saute onions, garlic and italian seasoning in oil
2. When onions have become transparent add in the artichokes and red peppers and saute for a few more minutes
3. In a blender, combine cashews and hot water and blend until smooth (about 2-3 minutes)
4. Add in lemon juice, liquid aminos, nutritinoal yeast and salt and blend until well combined
5. Add the blended mixture to the skillet and fold to combine
6. Cook until the mixture is heated through and somewhat thickened
7. Transfer to a baking dish and place in a preheated 350* oven for 10-15 minutes or just until lightly browned
8. Serve immediately with your favorite bread or chip!

No knead Swedish Cardomom Braid Bread
I got this out of the Vegetarian Times Magazine that my mom got me a subscription too.  (Piece of advice if your going vegetarian or vegan don't limit your self to recipes that label themself that.  There are so many ways to substitue meat and dairy products and still get a great tasting meal) You will try this once and be hooked!! The whole family loved this and one loaf was eaten before we even started eating!  It was super easy, and my first time making bread from scratch so don't let this scare you!  The bread is just slightly sweet.  Like my sister said it's great with a cup of coffee or tea in the morning.  You can really do a lot with it, eat it plain, with a little butter, cinnamon and sugar, Jam or even make french toast (which I haven't learned how to make Vegan yet but I'm sure there's a way!). 


Ingredients
2 Cups of almond milk (plus a little extra for brushing the tops of the loaves)
2 Tablespoon flaxseed meal
1/3 cup agave nectar (great alternative to sugar, looks like honey but is a thinner consistency)
1/3 cup canola oil (I used olive oil)
1 Tablespoon active dry yeast
1 1/2 teaspoon of salt
1 1/2 tablespoon whole cardamom seeds, coarsely ground with a mortar and pestle (I couldn't find these last minute in the store so I subbed 1/2 the amount asked with cinnamon)
5 1/4 cups of unbleached white flour
2 Tablespoon Florida Crystals Demerara sugar for sprinkling (I couldn't find this either so I used sun crystals which is made with stevia, I'm sure you could use regular sugar if you don't have these on hand)

1. Stir together almond milk, flaxseed meal, agave nectar, oil, yeast, salt, and cardamom in large nonreactive bowl with lid.  Add flour, and mix thoroughly with wooden spoon.  Cover with lid or plastic wrap and let stand for 2 1/2 hours at room temp.  Transfer to fridge and let rest over night
2. Coat baking sheet with cooking spray, or line with parchment paper.  Remove half of the dough from fridge (reserve remaining dough for second loaf. (will keep in the fridge up to 5 days).  Divide dough into 3 equal pieces, and gently roll each piece into 18 inch long rop on floured work surface.  Place doug ropes side by side spaced about 2 inches apart on the prepared baking sheet.  Pinch ends together on one side and tuck under.  Loosely braid dough ropes then pinch tail ends together.  Cover braided loaf loosely with a kitchen towel or plastic wrap and let rest 30 minutes.
3. Meanwhile preheat oven to 375* degrees. Brush top of braided loaf with almond milk and sprinkle generously with sugar.  Bake for 30-45 minutes or until golden brown.

** I wanted to elaborate on my intro.  If you haven't tried Daiya cheese you have to, it's a vegan cheese which comes shredded in a bag of mozzerella or american flavors.  I'm VERY picky about my vegan cheese, I haven't found one that I felt was worth eating or that melted.  This one blows everything else out of the water.  It taste so good and can be a substitue for cheese in any recipe that would normally not be vegan.  I have just started using it and I can't wait for all of the possibilities.  Husband has already requested ravioli, which should be a fun challenge. 
**Prior to my cooking days Husband actually taught ME how to make a really good bean dip that I use as a dip for chips, a bean burrito, or to top off nachos (the possibilities are endless).  It's SUPER easy, and fast.  I always keep a can of refried beans (I like Taco Bell brand, always be sure to check the ingredients for Lard which Taco Bell's does not) just in case I need a quick or easy meal.  You take a can of refried beans and put it in a bowl, chop up some onions and jalapenos (I typically use whole jalapenos that are in the can marinated with sliced carrots).  I use about 1/2 a med size onion and about 2-3 whole jalapenos but adjust to your taste.  Then add Red and Green taco sauce, mix together, pop in the microwave until warm and VOILA!

I have a lot to be thankful for this year, my wonderful Husband, the cutest dog in the world, my beautiful family, my job and friends.  The list is endless.  I hope you all enjoyed your holiday this year and remember all the great things to be thankful for.  Once a year isn't enough to be thankful, but it's a start. =)

As usual I hope you enjoyed today's photos and recipes!
Laissez Les Bon Temp Rouler!

Monday, November 29, 2010

Amateur Cook turned Amateur Blogger/Pan Fried Cabbage

There have been a ton of changes in my life the past few years.  New job, getting married, moving (twice!), and becoming a vegan to name a few.  With all of these changes I've been so wrapped up in becoming "domestic" and figuring out my life goals that I've forgotten about the little things that make me happy.  I've been wanting to start up a hobby or find something I'm "good" at that I can share with others and cooking just sort of fell in my lap.  It seemed like an appropriate progression after becoming a vegetarian turned vegan, of course it took me 2 1/2 years to get here!  I'm pretty good at finding something I can adapt into vegan at restaraunts but you never know what they really put in the food, and who can afford to eat out all the time anyways?  Plus after starting to cook a few new dishes I found it very rewarding to put together a bunch of nothings to make something that is actually edible, that you would even feel comfortable with sharing with friends (well sharing with others besides my family is still a bit scary but I'm getting there!  On a side note I'll be cooking for my friend Kayla in a month so she gets to me my guinea pig!  I'll be sure to blog about the expereince!)  I guess I got tired of the same ole meals that I would cook over and over again because they were easy and half way decent to eat. Not to mention the age old question "What DO you eat?" and my answer "Well.....stuff?!".  I wanted a good answer to that question.  I started posting photos of my new fouund hobby on Facebook not to brag (okay a little bit to brag) but I was so proud that I was actually COOKING that I had to share it with someone other than my husband (he has been very supportive by the way).  Speaking of my husband I guess you all should have some background on the man I will speak of often.  I'll be brief, you'll learn more about him as time goes on.  He's a very interesting fella!  He is a meat eater, not vegan like myself, although he is very open to my lifestyle choices.  I don't cook meat, or buy it for that matter, so if he ever wants to cook for himself he picks it up and cooks it!  Which is fine by me.  Most of the time he eats what I eat.  He is very open and will try just about everything.  He is honest and will tell me if something doesn't taste right (he helps me make the recipes better) but is the first one to sing my praises.  He knows just how to pick me up when I'm having a melt down after a bad day in the kitchen.  So life has given me the natural progression of blogging to share my new hobby.  I hope you all enjoy my blog.  Like cooking I'm a complete amateur.  I don't think of myself as very witty, or funny even so bare with me (Husband thought I should take this out, but what does he know?)  If anything I hope you enjoy the photos and recipes I will come to share with y'all!

So for my first blog I'll share what I cooked on a whim with not much left in the fridge. There aren't that many ingredients involved which made it easy for a work night.  Haluski (Pan Fried Cabbage and Noodles)!  Husband and I LOVE cabbage and I had almost a whole head of cabbage left over from another recipe I did so I figured this was an easy and yummy way to use it up!  I did make a few adjustments to the original, but it turned out great.  Next time I think I'll reduce the butter though as it was pretty heavy (even Husband agreed and he loves butter!)


Ingredients:
4 Cups of cooked pasta (The original recipe calls for egg noodles so I substitued for regular pasta, I think any kind will do)
1/2 Cup of butter (I use Smart Balance Original with Flax because it's vegan and taste just like butter!) (Like stated above I will reduce this next time as it was a bit much)
2 Cups sliced sweet oninos, about 1/8 inch thick (I didn't have any sweet onions on hand so I just used a medium sized yellow onion, which was exactly 2 cups and it tasted fine)
2 Teaspoons of brown sugar (I used agave nectar to substitute)
6 Cups of cabbage thinly sliced
1/2 teaspoon of salt (to taste)
Pepper to taste

Directions:
1. Cook pasta according to package directions, drizzle with a little bit of oil to prevent the noodles from stickting together and set aside
2.  While the pasta is cooking melt the butter in a large deep skillet over meduim-low heat
3. Add onion, sprinkle with brown sugar and saute, stirring occasionally for about 5-10 minutes or until softened and just beginnig to turn brown (I cooked for closer to 10 minutes, but I work on an old electric stove which can be tempermental)
4. Add cabbage to skillet, stirring well to incorporate, and saute for about 5 minutes stirring occasionally
5. Cover, reduce heat to low and let simmer for 5 to 10 minutes.
6. Turn heat back to medium, add cooked noodles, salt and pepper, and stir well to combine and noodles are heated through
7. Adjust seasoning if necessary, serve hot

Side note:  I added a dash of soy sauce and hot sauce to my bowl.  Husband isn't a fan of soy sauce so he added a little bit of "Slap ya Mama" seasoning (which I will use quite often in cooking, it's a mix of cajun seasonings that's a tad spicy), both were equally good! 

As a side side note, I made some hot chocolate before bed and it was yummy!  I got the recipe from the side of the hershey's choclate box and made my own adjustments!  Look at the ADORABLE mug my awesome Maw got me!  I <3 owls! 


Ingredients:
1 Cup of milk (I used almond milk as a substitue, soy milk would have done fine as well) heated in the microwave for 1 1/2 minutes until warm
2 Tablespoons of Hershey's CoCo Mix (this is just the plain CoCo powder no sugar or anything added) 
**I will use less next time, I'm not a huge chocolate fan so it was a bit chocolately for me, which made me have to add a ton more sugar, but if you like chocolate it would be fine)
2 Tablespoons of sugar (I used agave nectar, and again probably doubled it, I stopped measuring!)
1/2 teaspoon of vanilla
dash of salt

Directions:
1. heat milk in microwave
2. Mix coco, sugar, salt in mug
3. Slowly add milk to mug to mix
4. Stir in vanilla
Voila!!

My first post seems to be going on forever so I'll stop it here.  Next up will be 2010's Thanksgiving day feast YUM!  Makes me hungry just thinking about it!

As they say in the south
Laissez Le Bon Temp Rouler (Let the good times roll!!)